What will you need to do it?
Before importing any data through PowerPivot, you need to activate the PowerPivot window by simply clicking on PowerPivot menu and then click on Manage button under Data Model group.

After clicking on Manage button Excel will load the PowerPivot Window and it is completely separate from main Excel Window like below:
How to import data by using import wizard?
First of all you need to decide from which source you will import. It can be others database files like MS Access, SQL etc. Assume that, We are going to import a database from MS Access which is already I have. Now to import this database just follow the below steps:
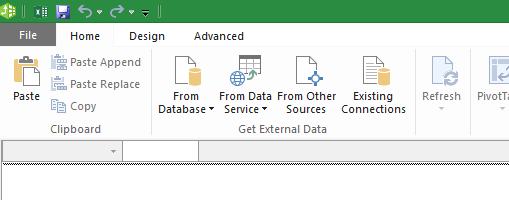
Click on Home menu and click on From Access under Get External Data.

After clicking on From Access menu, a dialog box will appear named Table Import Wizard.
Table Import Wizard:
Step 1: Connect to a Microsoft Access Database: Click on Browse button and select the MS Access file which you want to import and click on Next button.

Step 2: Choose How to Import the Data: In the 2nd step of Table Import Wizard you will see 2 options. If you would like to write a query then choose Write a query that will specify the data to import option. Else I would recommend you to select the first option Select from a list of tables and views to choose the data to import and click on Next.

Step 3: Select Tables and Views: In this window all the tables and queries will show and you need to just select the table name which you want to import.

In this tutorial I would like to select seslist and simply clicked on Finish button.
But there is another point which I need to discuss. If you would like to import just few columns, not all the columns as in seslist table, then select the seslist table and click on Preview and Filter button. This will appear Preview Selected Table:

By default, all the columns are selected. But you need to uncheck all and select the column which you wish to import.
Step 4: Importing: After clicking on Finish button you will see the result of importing your Tables and Query Tables. Click on Close button to close the wizard.

After successfully following the above steps, you may able to import the Access Database through PowerPivot Window in MS Excel like below image:

Importing data by using the Import Wizard of PowerPivot Window is very simple as shown above. It reduces the file properties. There are some others way to import data into your PowerPivot Window. These are: By using a custom query, By using Copy and Paste, By using an Excel Linked Table. I'll try to show a clear view about these in next.
Before importing any data through PowerPivot, you need to activate the PowerPivot window by simply clicking on PowerPivot menu and then click on Manage button under Data Model group.

Image 1: Activating the PowerPivot window
After clicking on Manage button Excel will load the PowerPivot Window and it is completely separate from main Excel Window like below:
Image 2: PowerPivot for Excel window
How to import data by using import wizard?
First of all you need to decide from which source you will import. It can be others database files like MS Access, SQL etc. Assume that, We are going to import a database from MS Access which is already I have. Now to import this database just follow the below steps:
Click on Home menu and click on From Access under Get External Data.
Image 3: Select From Access
After clicking on From Access menu, a dialog box will appear named Table Import Wizard.
Table Import Wizard:
Step 1: Connect to a Microsoft Access Database: Click on Browse button and select the MS Access file which you want to import and click on Next button.
Image 4: Connect to a Microsoft Access Database of Table Import Wizard
Step 2: Choose How to Import the Data: In the 2nd step of Table Import Wizard you will see 2 options. If you would like to write a query then choose Write a query that will specify the data to import option. Else I would recommend you to select the first option Select from a list of tables and views to choose the data to import and click on Next.
Image 5: Choose How to Import the Data of Table Import Wizard
Step 3: Select Tables and Views: In this window all the tables and queries will show and you need to just select the table name which you want to import.
Image 6: Select Tables and Views of Table Import Wizard
In this tutorial I would like to select seslist and simply clicked on Finish button.
But there is another point which I need to discuss. If you would like to import just few columns, not all the columns as in seslist table, then select the seslist table and click on Preview and Filter button. This will appear Preview Selected Table:

Image 7: Preview Selected Table of Table Import Wizard
By default, all the columns are selected. But you need to uncheck all and select the column which you wish to import.
Step 4: Importing: After clicking on Finish button you will see the result of importing your Tables and Query Tables. Click on Close button to close the wizard.
Image 8: Successfully imported data
After successfully following the above steps, you may able to import the Access Database through PowerPivot Window in MS Excel like below image:
Image 9: Imported tables in PowerPivot Window
Importing data by using the Import Wizard of PowerPivot Window is very simple as shown above. It reduces the file properties. There are some others way to import data into your PowerPivot Window. These are: By using a custom query, By using Copy and Paste, By using an Excel Linked Table. I'll try to show a clear view about these in next.